by photoanthems | Jan 16, 2022 | Blog
“I am not the same, having seen the moon shine on the other side of the world”
 |
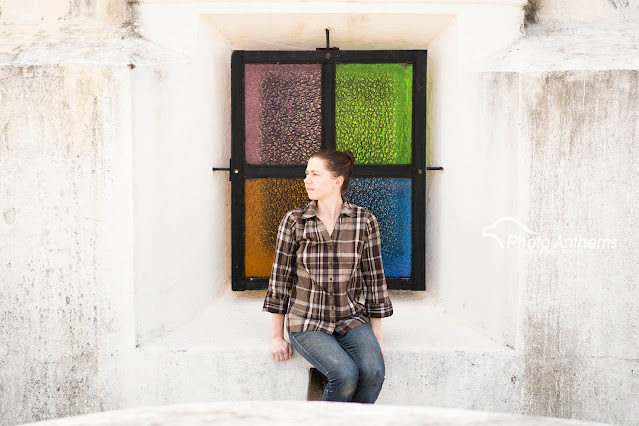
| Kayci.Lee Jan 2018 with me in Leon, Nicaragua. It’s weird seeing her with clothes on, I know. Bear with me on this. I’ll fix it on the next one. |
Honestly, who knows? I mean… dang! Covid has wrecked so many plans for so many people, who can say what they’ll be doing in 3 months, much less the next year.
BUT… I can tell you I will remain optimistic and plan as smartly and as practically as I can. I remain in Vietnam and aim to stay here for a while longer. The country as started to open up again and the immigration rules are returning to pre-Covid regulations… slowly.
This month marks 4 years since I set out traveling around the world. How many of you thought I’d be gone this long? I left in January 7th, 2018 accompanied for one month by Kayci.Lee. She and I traveled through 3 countries until she left early February. I spent 9 months in Central America, 9 months in South America, and then I came to Vietnam in Feb 2020 and a global pandemic hit as soon as I got here.
I have lots to get done here and I have not finished with my photographic goals. Last year was too restrictive to travel around to get the scenic landscape spots I wished for. I respected the government’s recommendations to not travel unless absolutely necessary and I adhered to the lockdown regulations while they were in effect.
Things are opening back up now, so I want to begin getting outside Hanoi (for a start). I have an apartment here. If the surrounding countries also become easy to move around in, I’d like to use Hanoi as a base and hopscotch around SE Asia. I will wait for things to normalize some more, so that I don’t leave and then for some reason have a problem getting back into Vietnam, while I have an apartment full of my belongings. If all goes well, I’ll jump over to Thailand for a month or so, get some great shots, and then return! And then do the same thing visiting Cambodia.
 |
| Kayci.Lee Jan 2018 with me on Little Corn Island, Nicaragua |
Probably the thing I’m interested in most is getting back to shooting film. I don’t have all the answers to doing that just yet, because I am so accustomed to not letting anyone else into my artistic process. I don’t have a darkroom or a scanner. That means I have to let someone else develop and scan my negatives and possible even print them. This is particularly true if I shoot color film. I can process B&W provided I have the facilities. I can’t say the same with color film.
Also, I want to shoot medium format 6×7 this year. Mamiya RZ67 (with the 110mm 2.8 and prism viewfinder) or the Pentax 67 (3rd Gen, 1990 version and 105mm 2.4) to be exact. Neither of those cameras are available here (as far as I can currently tell) and they are as expensive as the rumored Sony a7RV ($3500) that has yet to be announced. Don’t let me get my hands on a Fuji GX617! Man, for only 4 shots a roll, I’ll take one with the 105mm lens. I don’t think I can handle the 90mm. You need that center-weighted ND filter and if you lose it, finding another is damn near impossible. This is another hard to find and $3000+ camera! Lord a-mercy!
 |
| Kayci.Lee Jan 2018 with me in Leon, Nicaragua |
And truth be told, another reason I want to do medium format film is because the Mark V may be delayed until NEXT Christmas, from what I hear. That’s what sent my mind to film originally. Another challenge is that… I can’t see traveling with either of those film cameras. They are HUGE! It’s one thing that I’m sitting in one spot right now in Vietnam. It’s another ordeal entirely when I’m traveling continuously again. Can I make that sort of investment and then give them up after a year or two of shooting? Maybe I can donate it to an upcoming aspiring film shooter. I’d still have to get the Sony when it becomes available. Maybe I just want too much! As the Sony article states, this could be a year to upgrade skills rather than cameras.
by photoanthems | Jan 11, 2022 | Blog
 |
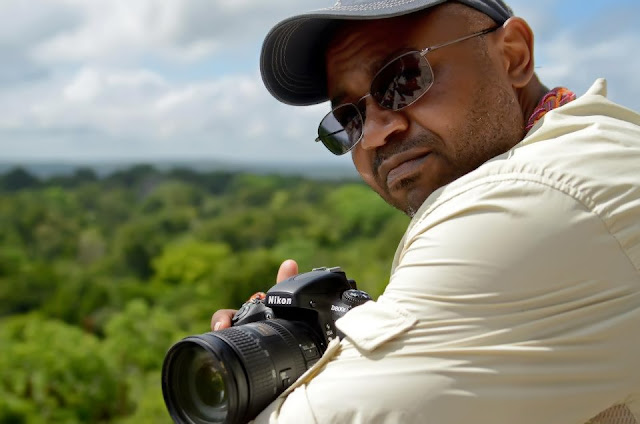
| Tikal, Guatemala |
While you wait for your passport, get back to planning!
- Where do you want to go?
- What sort of budget do you need?
- What is the weather like?
- What travel restrictions do you need to consider?
I look at Google Maps (or Earth) and start dreaming! What do you want to see? They pyramids? Waterfalls? What do you want to do? Backpack mountains? Go sledding down a volcano? What type of environments interest you most? Beaches? Jungles? Think about all those places you dreamed about but thought it was unrealistic. Where did that crazy aunt tell you she had her craziest adventures? Where did your grandfather deploy in service to his country?
Once I settle on a region of the world to visit, I think about what is might cost. That also helps determine how long you’ll be there. $2,000 in Central America can mean 2 months or it can mean a week in Europe. It will also help you determine WHEN you can go. Do you need to save up a little more money? What are you going to do when you get there? Are you doing Tours or are you just relaxing?
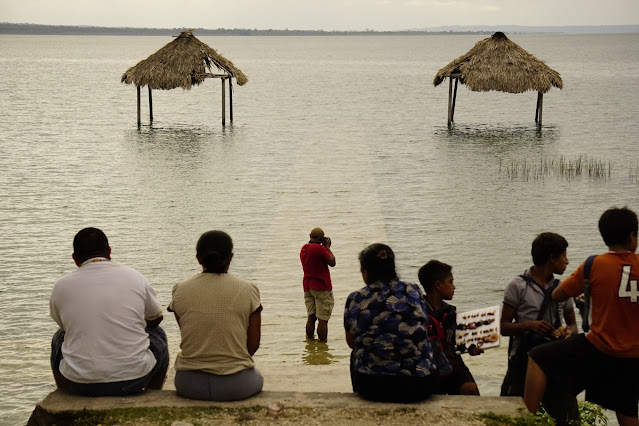 |
| El Remate, Guatemala |
The seasons and weather can help you determine WHEN you want to go. That’ll help you know how to pack and give you an indication on things you can do. Rainy seasons can be cheap times to go, but can you deal with that? Keep in mind… seasons flipflop south of the equator. Summer in the US is winter down there.
Covid-19 has definitely forced some changes to travel. You’ll have to check with the State Department to see what Covid-related travel restrictions and Travel Advisories are for each country of the world. Aside from that, they’ll also tell you what entry/exit requirements are necessary. That usually tells you what sort of visa you need. Keep in mind. The US has everywhere listed as, DO NOT GO, or RECONSIDER GOING recommendations right now, due to Covid. And do consider enrolling in the STEP program to get email updates on changes in your area when you are abroad. If you are not vaccinated… well, your scope of travel might be SEVERELY limited.
 |
| Las Siete Cascadas, Juayua, El Salvador |
I started with Central America for 4 reasons. One, I was invited. Two, it’s cheap. Three, it’s close (to the US), but it feels like you are on the other side of the world. And Four, it was something I promised myself I’d do when I was in the Army after I was deployed to Panama the first time (mid-90’s). I fully, completely, and whole-heartedly recommend starting in Central America! Mainly because of the first three reasons I mentioned, but it’s also much safer than what you might believe AND you (Americans) get a 90-day visa.
It’s not uncommon to begin travels to Europe. If you have that sort of bank, go get’em. European English speaking countries might make you more comfortable, but they are going to be costly as well. It’s up to you, but I invite you to leave your comfort zone at Baggage Check and come on out and have some fun.
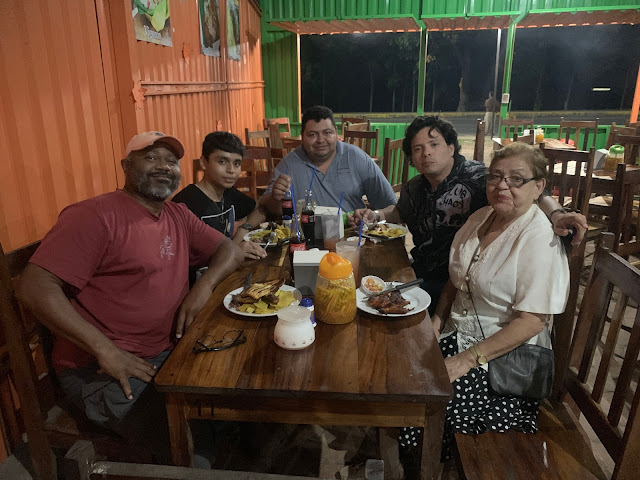 |
| Esteli, Nicaragua |
From there, after I knew the region I wanted to travel to, I jumped on Amazon and bought the latest Lonely Planet book on Central America. I could have just as easily got one from the Library, but I knew I’d take this book with me and I needed to make notes in it. I learned so much from this series of books. You’ll learn about the usual BEATEN PATHS that most tourist take, but you’ll also get info on the OFF THE TRAIL spots you can check out, too. The best information from this book series is on requirements to get into the country, places to stay, and things to be wary of. The latest versions are usually up to date with the latest information and details.
Having said that, I haven’t used those books in years! After a while, you can sort of graduate from them and learn on your own by researching the internet. I’ll usually begin with Wikitravel.org and start make book hostels/hotels on Booking.com or AirBnB.com. I might get some more details from Wikipedia.org or a Google search, but next I’m booking my flight, once I have a passport in hand!
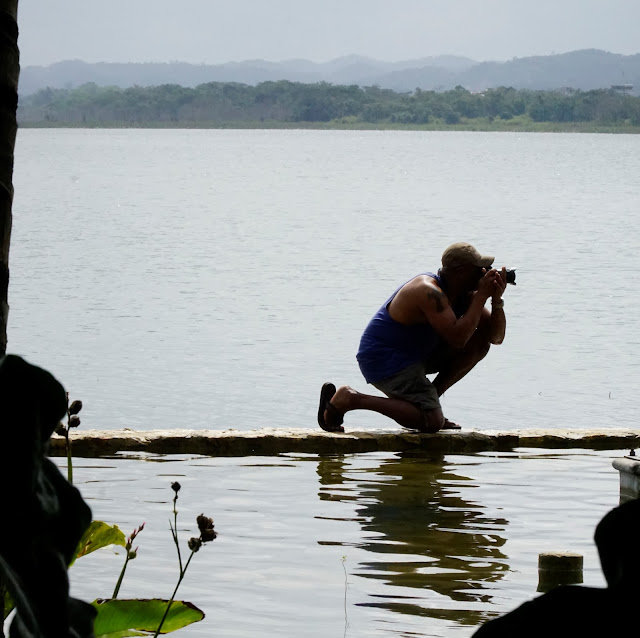 |
| Flores, Guatemala |
You can use anything you want to book flights. GoogleFlights, Cheap-O Air, Kayak.com… anything. If you have an airline preference, great. Got points, use’em. Otherwise, book your flights based on your budget preference. Most airlines have pros and cons and people will have opinions about their services.
Once you have that passport in hand… Book it! It’s not real until you book that flight and hotel. Once you do that, start shopping! You may not already have a backpack. I love me some REI. I think on one of my trips, I laid out my clothes and everything that I was taking with me and all of it, aside from electronics was from REI. It’s a great company and they’ve earned my loyalty… like proactively, so.
I usually select cargo pants that convert into shorts, dry fast, and are lightweight, but durable. I have the same criteria for my boots. I may get into more details in another post on packing and what to bring. Pack for your durations, the season, your comfort, and your convenience.
 |
| Quetzaltenango, Guatemala |
Ten Additional Tips:
Make sure you automatic payments for bills while you are gone.
Let your bank know you are abroad, so they don’t block your cards!
Arrange to suspend mail with the post office.
Make sure you have ample supply of your prescription medication.
Bring an extra pair of glasses in a hard case.
Download books, music, and movies before you go!
Keep the camera gear simple. DO NOT bring all your lenses. You won’t use them.
Pack some Pepto Bismol and or Alka-Selzer tablets with you.
Drink water from unopened bottles ONLY!
Get an app that converts the local currency.
by photoanthems | Dec 30, 2021 | Blog
 |
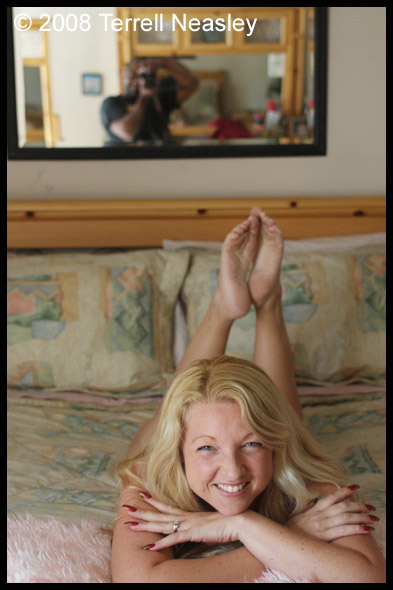
| Art Model, Faerie |
The new year is about to begin in just a few days. 100% of you will make some resolutions that only 99.3% of you will keep. 2021 has proven to be a travel restricted year, so I’m going to guess many of you will make New Years Resolutions that involve traveling abroad. Well, let’s see if I can give you some pointers. I have been continuously traveling since January 8th, 2018. But I’ve been backpacking abroad purposes for 10 years, (not including military service.)
If you desire to see the places you read about or learn about from TV, then as the title says, It all Starts with a Passport! That’s where you begin. There will be special cases for some people, but most everyone can simply call ahead to make an appointment with their local post office and tell them you want to apply for a passport.
 |
I wish I had her original files with me.
I’d be fun to play with some new edits on them. |
Give yourself PLENTY of time! This is not a quick process! Start your application at least 3 months before you think you will need it. Better still, start it now, even if you are not considering traveling in the next year. That way you have it on hand when the travel bug bites!
First, get certified copy of your birth certificate or proof of citizenship. For the certified copy, you can order it online or go to your state/county Vital Records Department. Bring this and some form of government-issued photo ID, such as a driver’s license to the post office. AND your Social Security Card. Have that with you. They’ll have you fill out a form DS-11 for an application for a NEW passport. If you like, you can >>click here<< to download a printout of the DS-11 form and then print it your self. If you need to renew an old one, it’s a form DS-82.
 |
| Art Model, Faerie during one of my drawing sessions |
Many post offices have services for passport photos for $15. If they don’t offer this service, you can get that done anywhere. You’ll just have to google possible locations. As of 27 December, prices have gone up recently by $20. Don’t trip about this. A new passport is now $165. Renewals are now $130. Just pay it and look forward to enjoying your trip.
This process can take up to 14 weeks! So don’t go booking your ticket for next month and then get stressed hoping your passport comes in on time. Don’t book a thing until you have a valid passport in your hands! Keep in mind, there are several factors that can keep you from being eligible to have a passport. If you’re behind on child payments, don’t expect a passport approval. Some criminal records, especially felony or even misdemeanor drug charges will stop you cold. Federal loan defaults can do this too. Check out your particular situation and see if you are affected.
Stay tuned for Part II where I get into planning your trip!
 |
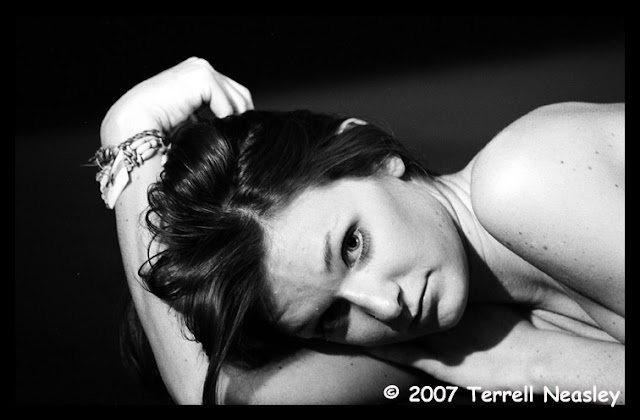
| Everybody loves a happy Faerie! |
by photoanthems | Nov 27, 2021 | Blog
 |
| Art Model, Dana |
In November of 2005, I photographed my first nude model. This month makes 16 years since I began my favorite genre of photography. So with respect to my beginnings, I’m going to address an idea for beginners! However, if you aren’t interested in getting better at photo or at least learning more creative and fun techniques, don’t worry about this blog post. Then again, read it anyway and see if your curiosity is piqued.
FILM PHOTOGRAPHY!!!
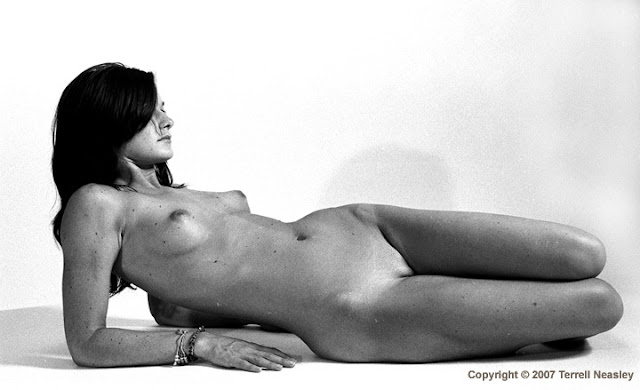
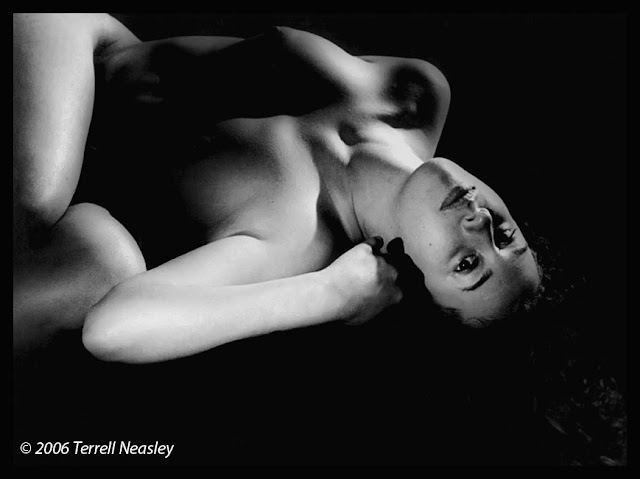
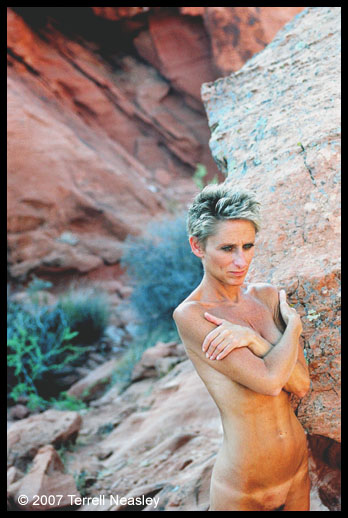
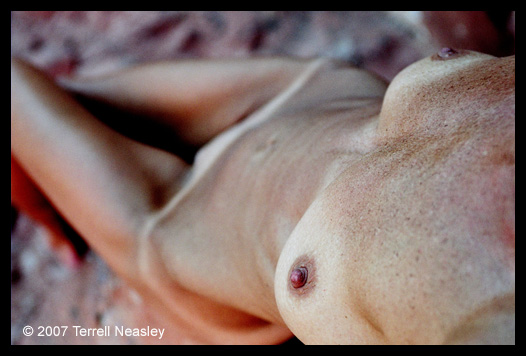
That’s right. I am talking about stepping away from the digital world and falling back to the stone age before a camera even needed a battery. Yes, cameras existed even then and if you take a look around, you’ll witness the re-emergence of the film genre. BTW, all the images in this post are my early work shooting film.
Look for an old camera that your mama used to use, or one that’s been passed down through your father’s lineage. Ask them! They just might take you up to the attic and pull out an old box full of pics, old film cannisters, and maybe even a dusty old camera.
 |
| Art Model, Dana |
OR, go to a thrift store. They almost always have something. If you see a camera and it has the letters, L-E-I-C-A on it, in that exact sequence… or a big red dot, GET IT! Buy it for whatever they want. If not, just look for something that seems like it works. If there is a local camera shop nearby, take it to them and let them have a look at it and clean it up.
OR, take a look at Amazon, Ebay, or any online used gear retailer and type Canon AE-1 Program in the search bar. If you are afraid of Canon, check out the Nikon F2, unless you want to get away from the BIG2… then bless yourself with a Pentax K1000. Go this route if you want an easy entry into the 35mm film genre as there are still plenty of camera choices, lens alternatives, and film formats readily available and you can always find someone to develop the film.
If by chance you are feeling froggy and you have nerves of steel with the heart of a champion, say no more and orient your quest toward either a Hasselblad 500 C/M, the Pentax 67, or a Mamiya RZ67. Lens choices can get steep with these but you can find some deals. You are really taking your coffee no sugar if you find a twin lens reflex system like a Rolleiflex, the Yashica MAT-124G, or a Mamiya C330. You don’t need an additional lens budget for these cameras because they come with fixed lenses anyway. These cameras use medium format film. Much larger resolution than 35mm film, but might be more difficult getting it processed. You can easily do this yourself, though with a few lessons. Developing your own film just takes a commitment and for some, it’s the least fun part of photography. I loved it!
FOUR ADVANTAGES OF FILM PHOTOGRAPHY
I’m not going to get into the technical aspects of digital vs film. This post isn’t about the analytical, technical, logical, and certainly not mathematical. Instead, I want to focus on the imaginative, artistic, and intuitive elements.
Film helps you See
Particularly in Black and White photography, color can be a distraction that deviates your mind away from the composition. When it’s all B&W, composition plays a greater factor. When you look through the viewfinder, yes… you are still seeing color. But when you get that roll developed in B&W you see what you were pointing your camera at and how it turned out. You begin to see in B&W. Even though color elements are the input into your eye sockets, your brain will soon interpret those signals into B&W. THEN you begin to better see lines, patterns, geometric shapes… like circles, triangles, and rectangles. You’ll see vanishing points, repetition, and anchoring elements. Balance will become important and you will develop your style much quicker.
Film helps you be Patient
Back in the military, I trained soldiers to slow down. Survey the landscape. Find your target. Aim. Breathe. Take your shot. The mechanics of shooting a weapon are the same as shooting a camera. Survey the landscape. Find your composition. Aim. Breathe. Take your shot. In both cases, you press the shutter/trigger with slow deliberation. Trigger squeeze and breathing control are two elements of marksmanship and it’s the same with a camera.
Shooting rapid fire shots don’t let you hit a damn thing. Limit yourself to 36 shots and you WILL learn to compose better. You will think about each shot and be more deliberate with your shot selection. It’s inevitable. If you want to slow it down even more, shoot from a tripod and really see your shot. I follow this guy on Facebook. He’s the father of a friend/client of mine who I worked with doing desert shots near Las Vegas. His dad is always out somewhere knee-deep in a stream or barely visible in the bushes somewhere. The man is enjoying himself and making money selling his art. But he puts in the time! He’s not shooting film, but he does shoot from a tripod and I’d imagine it isn’t just because his gear is heavy. His name is Sam Pathi and he’s a bad ass landscape photographer. You want a role model? Inspire to be like this guy. You can see his son, Eric on IG @ericpwiseguys.
 |
| Art Model, Jacinda |
“You don’t take a photograph, you make it.” – Ansel Adams
Film will help you Make Photos
Ansel Adams is arguably the most famous photographer all-time. That was one of his quotes that suggested that a photograph wasn’t something that already existed and you simply needed to grab it. Instead, it was something you create. You make it. You don’t simply take it. Aperture, Shutter Speed, and ISO are the elements you use to create the exposure you desire for any given scene. A shot does not exist without these three elements in some mix. Each one regulates and manages how light is used to make a photograph. Don’t just use full auto. Learn this and practice.
You also make a photo by learning to focus manually. It takes an added second or two to turn that focus ring (at any given aperture, focusing at any given range). You decide how much of a scene you want in focus and then manipulate the lens to make that photo. Learn those techniques and practice.
Film will help you Save Money
This isn’t as intuitive as the previous listed advantages, but it still goes on this list. You are definitely going to save some cash with film. You’re looking at maybe a $250 initial investment maybe if you’re going 35mm film. Expect to spend a grand for the camera, batteries, storage cards, lenses, etc. if you start out digital. Chances are, you’ll likely find a deal on a digital camera that comes with a bad, tripod, and more.
This might not be the case if you get really interested in photography and you need to make a more significant investment. It will happen. The more you know, the more you grow. The more you grow, the more you go broke. Kidding. I should have said. the more you grow the more you need dough. But if you are getting better AND got the budget, mosey on up to the medium format systems and challenge yourself. Instead of 36 exposures a roll, you get 10 to 15 shots depending on the camera. That Pentax 67 will give you TEN shots! Talk about shot planning! It uses 120 roll film. And medium format utilizes a variety of sizes which explains the different range of shots.
* * *
Film is not dead. It declined for a while, but it’s back. The Lomography phenomenon (and company) along with Kodak, Fujifilm, and others have fed the resurgence of love for film. But I say it’s mainly because of people like Dave Rudin who refuse to give it up and continue to do professional and artistic work with film. It’s huge here in Vietnam. There are good functioning cameras all over the place and in the hands of the young and eager. I love it.
So do yourself a favor, Rookie. Reread the blog. Do some more research. Get yourself in a good camera system that you feel comfortable with. Go buy some film and go shoot. Kodak TMAX 400 was my all-time favorite film to utilize. What is yours?
 |
| Art Model, Laura |
 |
| Art Model, Laura |

by photoanthems | Nov 14, 2021 | Blog
 |
| Art Model, Viki Vegas |
“It is an illusion that photos are made with the camera… they are made with the eye, heart, and head.”
-Henri Cartier-Bresson
Let me start of with this, there is no such thing as a Camera for Beginners. There is only ever the Camera that you NEED. That’s what you go on. But for the sake of this topic, I’ll buy-in to the notion of a beginner level camera. That being said, I’ll concede the concept of Entry-Level Cameras. I know… am I quibbling over semantics: beginner vs. entry? Well, hell yeah. Entry level describes the camera, not the consumer. It is usually a base-model thrown in to get attention for the people who just want a decent picture. Okay, maybe that is what a beginner needs.
Nah, screw that! I do not concede and here’s why:
You may be new to photography, that’s okay. And it doesn’t mean Entry-Level is for you! I’ve been teaching photo for years. The number one question I get is, “What kind of camera should I buy?” My answer is always the same. You get the camera that you need! Buy what fits the reason you want to take pics and also fits within the constraints of your budget. There has not been a single time in all these years that I have recommended an Entry-Level camera to someone. NOT ONE TIME! I do need to qualify that a bit in that I’ve been asked to recommend one Entry-Level system over another when those were the only options. That’s the only time.
Here’s the deal. If money is not an obstacle and you are not concerned with practicality, there’s a good chance Leica will come up in the conversation. Leica cameras are the opposite of Entry-Level. But you can start with them if you can swing that price point. I’ve sold them to first-time users who wanted to have a camera that not only took pics, but also made a statement. However, being more reasonable, if you ask me what you should get, the first thing I’m going to ask in reply is, “What do you want to take pictures of?” And that is where it begins.
 |
| Art Model, Viki Vegas |
In all likelihood, it’s going to start with lens choices. Say for instance you tell me you love bird watching and it just so happens that you are traveling to Costa Rica. Does camera come into play? Not at first. You have a lens requirement. You likely need super telephoto capabilities. The camera might come into consideration because of WHERE you are going. Entry-Level cameras aren’t traditionally made to be durable. The are generally plastic with no weather sealing. If you are traveling to Costa Rica, you may want to pay attention to the humidity and the probability of heavy rains. The lens won’t mean a thing if you can’t keep moisture out of your camera. You need something that can keep the electronics inside dry.
If you are a grandpa wanting to take pics of the babies eating up the living room carpet, then your needs are not that demanding. An Entry-Level system isn’t too complicated and there is not a need for anything specific. Chances are, the camera will sit on a shelf for most of it’s life as the cell phone proves to be more convenient. You don’t really love photography for the sake of photography. You just like good pics every once in a while. You’re not trying to learn something new, grow and develop lighting skills… you just want to fill the picture album like your Nana did for you as an ankle-biter. In this case, an entry-level kit, (camera and the lens it comes with) may not be a bad option.
There are a lot of used systems out there if budget is an issue. You can still get a good camera and lens if you’re not sure if you’ll stick with photography long enough to make it worth a brand new camera investment. Buying used gear is an excellent option. Renting is another possibility, either from your local camera shop or from online businesses like BorrowLenses.com or LensRentals.com. If you are torn about whether to drop some serious cash on a new system, rent the camera system before you buy it. See how you like it. Either way… buy new, buy used, or rent… you need to be aware of your primary considerations.
 |
| Art Model, Viki Vegas |
“The camera is an instrument that teaches people how to see without a camera.”
– Dorothea Lange
Think about the Lens first.
Lens choices address the needs of photography faster than most those of the camera, (unless video are the primary goal). The lens is first described by it’s focal length and those usually come in these categories: wide-angle, normal, telephoto, and super telephoto. You can throw in Macro, tilt-shift, and ultra wide-angle, as well if that’s that’s what you need. However, the first 3 mentioned focal length perspectives are going to cover about 90% of shooter needs.
I deleted 4 paragraphs that go into describing lenses and things you need to consider. But that’s making this post too long. Instead, check out my previous post detailing much more material on that matter here: => “
Getting into Photo, Part II : The Lens“.
 |
| Art Model, Viki Vegas |
And then there are camera considerations.
First consideration that everyone looks at is megapixels. But in all honesty, it really doesn’t matter! Most digital cameras now come with at least 24 megapixels. For 90% of you, it’s more than adequate. But depending on what you want to do, maybe more is necessary. The more important the detail, the greater the need for a higher MP camera sensor, but 24 is damn good. Full disclosure… I am a megapixel nut. There. I said it.
Durability is also a factor. Will your camera be subjected to rain, dust, and high/low temperatures? Can you reasonably expect it to get banged around a little bit? I’m not talking about being dropped. That sucks for any camera. No matter how careful you are, if you’re going into harsh environments, the camera is going to take a beating. I’m very careful with my gear. That didn’t mean squat when some rednecks in a big white Ford pick-up started doing donuts and belching exhaust as I was doing a photoshoot in a dry lake bed. I was shooting with 3 studio lights (on battery packs), softboxes, and at the time, I didn’t see a need to shut my camera case with all my gear in it before those bastiches came flying in with their monster truck. And then they took off. Dusty gear and dusty models. At the end of the day, I was just glad they didn’t run over anyone. The point is, your camera needs to be able to stand up to unpredictable situations, accidents, and unforeseeable circumstances.
Size Matters! This is what I’ve found. The bigger the camera, the less you shoot with it. Chances are, if you’re not making money doing this, you’ll keep that big camera on the shelf as something nice to look at, if you start out with a large, heavy system. You’ll opt to using your cell phone more times than you would think, especially if you have a really nice phone. For damn, sure look at mirrorless cameras. No need to go DSLR and lose out on all those advantages. Pretty much all camera manufacturers, except for Pentax are leaving the DSLR in the dust. It had a beautiful run, but now it’s watch has ended.
 |
| Art Model, Viki Vegas |
Other than cameras and lenses, consider these other accessories. Tripod! Just friggin’ get one. Not a cheap flimsy one, otherwise what’s the point! Get a cable release to actuate the camera without you having to push the button. Have a comfortable neck-strap. Don’t get sold on anything gaudy, I mean… come on. All you’re trying to do is take the pressure off your neck. Invest in a good, convenient bag. Shoulder bag, backpack, or sling bag… depending on how much gear you’ll have with you. And that doesn’t just mean camera stuff. Gonna be out all day? Pack a lunch. Bring water. Have some drybags in case it rains. Purchase extra batteries and storage media, probably more than you think you’ll need.
So yeah… think about these things when you’re ready to get a camera system. Personally, I’m still a Sony guy. And I still like Fujifilm cameras. If you can spend on a decent system, a Sony a6500 with your choice lens selection, will likely fill all your needs. A Fujifilm X-T2 or newer will likely do the same. I had a Fujifilm XE-2 and I can’t speak enough how amazing that camera is. It was repeatedly submerged in the Pacific on my back, cuz I almost drowned, and the camera came back after sitting in some rice for a week. Amazing pics with that thing.
Study up. You have no shortage of options.
 |
| Art Model, Viki Vegas |

by photoanthems | Oct 15, 2021 | Blog
“It’s okay to be absurd, ridiculous, and downright irrational at times; silliness is sweet syrup that helps us swallow the bitter pills of life.”
I’m in a mood, I guess. I could use a little bit of silliness. Maybe you can, too. I’ve been here in Vietnam for 20 months. Lockdowns have just been curtailed and things are beginning to get back to normal again… at least here in Hanoi in the north of Vietnam. To the south, Ho Chi Minh City is getting better, but they were the worst hit with Covid-19.
Let me just say that Vietnam has managed this pandemic in exemplary fashion. The Delta variant came along at the end of May and changed everything. For more than a year, Vietnam held covid in check. Delta was another story. We went from about 3,300 total cases at the beginning of July to 850,000 today. In hardly 3 months deaths went from 35 to 21,000. Y’all can say what you want, but I’m watching the measures they take to curtail this virus and their response to this pandemic been extraordinary, compared to most places in the world. It took 3 months but they even got control of Delta. Vaccines finally began rolling out and numbers have plummeted. Good government and good citizens working together and the rest of the world should take notes.
 |
| Art Model, Leslie ©2013 Terrell Neasley |
Now, back to my topic…
As things lessen up here, it’s hard not to think about going home. As I said, it’s already been 20 months. However, this is something I already anticipated. I expected to be gone two years on this leg of my trip. What I didn’t expect was being in the same place. Had I stuck to my original plans, I’d be in Australia now, getting ready to make my way to the Islands of the South Pacific. namely Fiji, Tonga, French Polynesia, and The Cook Islands. Quite possibly, my pining for new gear is a result of previous mental programming. I had anticipated upgrading my gear at the two year mark after returning to the US again!
Now, that’s not likely to happen, just yet, but my subconscious obviously doesn’t know that. And the camera I want is not even out yet. I’m pretty sure, I’m sticking with Sony gear. I currently rock the Sony a7RII. The Sony a7RV should be out sooner or later and I’m already certain I want it. It had BETTER have a fully articulating rear LCD screen! I don’t know if the thing will be 100MP or not. It could be 61MP, like the a7RIV.
 |
| Art Model, Panda © 2011 Terrell Neasley |
As I have mentioned before, I have to upgrade both my cameras if I do this. I refuse to carry two different battery types and all the newer systems have Sony’s larger batteries (NP-FZ100) in them. My current second camera is the a6500. I love having a crop system to complement my main full-frame body. I’ve done that for years, every since I was with Canon with my Canon 5DMkII and the 7D. Therefore, I’ll have to option to upgrade my crop to the latest one… whatever that will be by the time I get back. Likely a6700.
OR, I could go full-frame for the second camera which in this case, it would be the a7SIII, (which already has a fully-articulating rear LCD screen). Choices, choices. Both those cameras will be about $3500 each. Dang! I’m inclined to have the crop system due to the fact that it gives my lenses some added range. They get magnified by a factor of 1.5 times. That’s a great complement, to me. In doing so, I’ll have to get a slew of extra batteries, but the each camera uses the same one. In addition to that, I’ll need all new, fresh memory cards. Either way, Sony a7SIII or a6700… which also isn’t even out yet.
 |
| Art Model, Justine ©2015 Terrell Neasley |
What else, beyond that? Oh yeah… one more thing. I gotta have that Tamron 35-150mm f/2-2.8 Di III VXD. I’ve been shooting prime lense during this whole trip. Now I think I MUST have some range in my arsenal. Currently, I shoot with a 35mm and a 55. That’s it. I left my 90mm Macro stateside. I sold my Sigma 24 1.4 and picked up the Tamron 35 2.8 macro. I lost speed, but regained macro capability. But this new Tamron is right up my alley in terms of range. It’s not huge, but it’s also giving me 150mm at f/2.8. On a crop sensor, that 150 turns into a 225mm, (still at 2.8)!
Whenever I do return to the US, I won’t be there long. I’m still on this mission! I may return to Vietnam again or continue on where ever they’ll let me come visit. Cambodia, Thailand… it all depends on several factors. But if I get my way… dang. I’m gonna come right back here. I’m not done with Vietnam!

by photoanthems | Aug 27, 2021 | Blog
 |
| Yep, that’s me meeting Dave Rudin for the first time and showing him my portfolio prints at the Original Pancake House in Las Vegas, NV (before it burned down). |
Okay, I’ve been meaning to do this post for years. I get asked about it often enough and will mention it a few times, but I’ve never explained myself. Just to set the stage, there are no quantifiable factors that determine the best photograph or even best photographer. You can assess whether or not a photograph or photographer is good using photographic critique, but even there you can still get stuck in the quagmire of opinion, which can lead to interesting debate hopefully. I think it’s a good thing to talk about photography and that is what I will do here. I’m going to talk photo.
In an attempt to begin, we must battle with the concept of “BEST”. The notion of GREAT is more easily argued, but BEST? What makes it the best? How do you factor out all the great photos by iconic photographers made from as far back as the first photo ever taken? There are wartime images by Nick Ut or Mathew Brady that are certainly iconic once in a lifetime images. Dorothea Lang showed us the disparity of the Great Depression and the hardships Americans faced and endured. Or maybe we can look to celebrity or sports figures with Neil Leifer‘s iconic photo of Ali standing over Liston.
Is Amos Nachoum’s “Facing Reality” the best wildlife image ever? Or is it this one by Henley Spiers “Between Two Worlds“? How do you tell? Is it being in the right place at the right time? Is it a matter of creativity? Waiting for your shot like a sniper? It can be any and all of these. But the one that I’m calling the best All-Time was a created shot. It was a deliberate choice of model, location, camera, style of edit… everything.
 |
| All-Time Best Photograph Ever made |
And yes. I confess. Dave Rudin is a friend. Is there some bias here? Maybe, but I’m going to say no. I have lots of friends who are photogs and I knew this shot was my fave all-time before I ever met Dave Rudin. And now, I’m going to break it down why:
It is a Nude
I had a photography professor teach me that I should shoot what I love. I decided two things. One is that there is no other thing on earth more beautiful to photograph than the nude form of a woman, (particularly if it’s the one you love, I think). There is no sun to rise or set, no flower to bloom, and no puppy cute enough to distract me from God’s gift to the world of the nude female. And second, I heard a quote at some point that said something to the effect of… that there is no photo to exist whereby it can’t be improved with the addition of a nude.To me that makes the nude like bacon. Add it to anything and it becomes great. I have yet to try that with ice cream, yet, but I can imagine. (Bacon… not the nude). So there you go. That factors out any photo that doesn’t have a nude model.
It is Technically Superior
This is the least of my qualifiers just because most people can set their cameras to auto-everything and come out with good sharpness and exposure. Nonetheless, it’s still an important one as many photogs still fail at this despite advanced camera features and automatic functions. What happens if your subject is moving? The camera doesn’t know that. It will give you a correct exposure for any given light, not the stillness of your subject. What happens if your subject is in two extremes of light and darkness, set in stark shadow, but you also need the surrounding sunlit landscape.
It is Compositionally Sound
You can use rule of thirds, The Golden Spiral, or Triangles. It simply fits! Composition makes or breaks an image. It naturally defines compelling and composed images that are unconsciously aesthetically pleasing to the eye. You may not realize it, but your eye naturally follows lines and you are more engaged in images with leading lines, good geometry, shape, patterns, and symmetry. This image is anchored by the hole in the rock, which supports the model’s weight and forces the her body to shape around it in intriguing and interesting ways.
 |
| Spiral follows curvature of the model and then tightens at the hole in the rock which is the anchor point of the whole shot. |
 |
| Model is set diagonally across the grid. Head takes upper right quadrant. Torso occupies the middle, and hips/legs take the lower left quadrants. |
 |
| The model’s shape follows the height leg of each right triangle, intersecting the base at the hand and almost right on the hip. |
 |
| Diagonals lines parallel the torso and arm while the other two lines dissect the nipples and hips. |
It is built by Dave Rudin
This photograph is made entirely and masterfully by a skilled artist. He selected his model,the time and location, the specific rock “prop” within that location, his camera/focal length, and finally his edit.All these were deliberate choices made by the photographer. Carlotta Champagne is one of the most prolific models in the business with a million plus followers in IG. Her attitude, shape, and pose lends itself to this composition in a way that helps elevate it to greatness. Another model may not have been able to pull this off. Her head angle and eyes reflect an attitude that Dave may not have asked for, but being a professional model, this is what she brings to the table. Think of your all-time favorite movie. Now imagine Frodo cast with Eric Stolz and Gandalf played by Gene Wilder. See what I mean? @carlottachampagne was perfectly casted.
I don’t know, or at least don’t recall, if Dave framed her like this in camera or cropped her in post. I have no idea what her feet are doing, but I am not missing them. I don’t even care. The crop is perfect. The hole in the rock looks almost like a fulcrum with almost tangent levers in two positions. One can level out across the photo from left to right, whereas the other lays down diagonally and I like it. It reinforces the importance of that hole, because outside of it and the model, there is nothing else. This is a minimalistic composition as almost half the diagonal is empty space (the wall). I can also appreciate not cropping away all of that upper wall depression in the right. Dave photographed what was there instead of trying to make it too perfect. Perfection is reality.
I will also add that this image was shot using film. Dave is a traditionalist when it comes to his artwork. He did this shot a year before we met. He contacted me not long after I started this blog in 2007 and asked me to lunch since he would be in Las Vegas, visiting from Brooklyn. I’ve always appreciated that. So yes, there may be some bias that I don’t see, but I’m telling you… this is the best photograph that I have ever seen. Period. Hands down. Drop the mic. Turn out the lights and go home. This debate is over. Check out my original blog post below

by photoanthems | Aug 11, 2021 | Blog
 |
| Interesting Locations – Art Model, Susan |
Sometimes you just have to get off your ass and go. I’m still harping on the “Regaining the Passion” that I started earlier with “Why You Should Shoot for Yourself More Often“. I followed that with an article on Flash and then again with Ambient Light as some easy alternatives to help you blow on those embers that could ignite your photo passions again. LOCATION is what I wanna cover at the moment. Why? Cuz its easy. You simply get your ass up out of the house and go someplace with the explicit and direct intent to photograph something.
Urban
Sometimes people will tell you to start in your own backyard. Nah. Not good enough. You are still too comfortable in your own house, yard, or neighborhood. I don’t see that as “blowing on any embers”. To fan the flame, you have to go beyond, but you still need a place to start. Downtown is okay as a beginning point if you like. I lived 12 years or so in Las Vegas, so downtown is the Las Vegas Strip. Or so you might believe! Actually, downtown is FREMONT STREET! It’s a little different but yet similar to the Strip. A different kind of folk walk those streets and a many of characters will present themselves for your photographic pleasure.

But there are still other urban areas in Vegas and you have them where you live too. Well, unless you’re living out in the sticks, in which case you might have a further drive than most. Street Photography can be the thing you need to rejuvenate and get a fresh start in photo again. Look up some examples of popular street photo work. Not to necessarily copy or emulate, but rather to just see what the possibilities are. Walk around first before you even pull your camera out. Observe. Listen. Smell. See the potential scenes that lie before you. In the Army, as we’d begin our patrols, we would stop a few hundred meters in, take a knee and become familiar with the sights, sound, and smells, of the environment we were about to immerse ourselves in. We called it SLLS, or sills. It’s the same thing here. In this case, it can help you see and anticipate events that might be developing and thus better prepare you to capture that decisive moment. This can make the difference between THAT shot and JUST ANY OLD shot.

You can pick a theme to help you focus and look for something. Shooting the homeless has been very popular, but I find that to be a tough one sometimes, personally. Photography fundamentals and principles still apply. Look for and utilize shadows, repetitious and geometric shapes, reflections (in windows or puddles), or maybe practice a theme of minimalism. You can also change your perspective a little. Everything doesn’t have to be done from an eye level! Get down! I mean it. Get low to the ground and see the world how a dog might view it. Or change it up and shoot from above and get a bird’s eye view of things. Just do something differently or unexpected, so things don’t get predictable or boring. You may do photo for yourself, but you still want others to see it. Show them something fresh.
 |
| Art Model, Mary |
Out and About in Nature
I can dig some urban, but now we’re getting into my scene! The woods! The desert! The mountains! As well as the BEACH! Natural surroundings appeal to me most. Especially spots where I have to get off the beaten path a bit. Over the last three years, my ongoing travels have taken me through Central/South America and now Vietnam. Seeing new things in God’s creation can heat up the coldest of passions and make it blaze. I’ve been to spots that make you want to put down the camera and just keep that vision all to yourself. If you can, bring a friend along whose company you enjoy OR somebody who knows the area and can be a guide of sorts. It’s not always fun to get lost ( though sometimes it can be!). I can’t tell you how many people I’ve taken out into the boonies… who have lived nearby all their lives… and yet had never previously seen the beauties that Red Rock has to offer. Or Lake Mead, Valley of Fire, or either of the hot springs near Hoover Dam at Goldstrike and Arizona. All these areas are within a hour of Las Vegas.
 |
| Art Model, Mary |
You’ll have to find out what appeals to you in these natural settings. For me, I can say a good, unique landscape vista is what I find most captivating. On the other hand, you may be more interested in the wildlife or birds. Photographing big horn sheep will be vastly different than photographing hummingbirds or egrets, mainly in the lens choices. You’ll need some telephoto action, but you don’t have to have as fast of a lens as you might with hummingbirds. Flowers are highly popular to shoot. Again, lens choices come into play. If you like to shoot a field of wildflowers, a normal zoom or better yet a wide-angle lens would work. However if you’re wanting to get close enough to depict the petals and stamen of the Angel Trumpet flower, then a macro lens is your best business. You may also need to be on a tripod in many cases using a remote switch/cable release.
Go Out at Night
 |
| Art Model, Anne |
Whatever you do when you are out in nature, do it again only this time, after dark! Venture out to the same place and see what adventurous landscape shots you can find. If you have a model, try some unique lighting and poses with the stars in the background. Okay, so it’s a bit more work. You’ll need a tripod and likely a source of light, but that can be a torch, headlamp, or the moon! An 8-second exposure will give you good illumination on a decent full moon. You’ll need longer if all you have are stars. But still… that can equate to some excellent landscape work. Practice your Milky Way shots, or maybe time-lapses.
 |
| Art Model, Covenant |
Make sure you consider the area you visit. Safety first! Have a friend with you or at least let someone know where you are going. Try camping in a state or national park near you. I didn’t grow up visiting many national parks, but I did explore the woods around my house as well as some much further away. Read up on the area you wish to visit and educate yourself about the fauna and flora that could pose a danger. Be conscious of the weather! Avoid areas and seasons that are prone to flash floods. Carry the appropriate gear, water, and food you need to keep you warm, dry, safe, and comfortable.
Book a Flight
 |
| Art Model, Trixie |
You’re not gonna do photo without spending money. So either come to terms with that notion or take up treasure hunting with a metal detector on the beach. Some people find that very soothing and quite rewarding. Ain’t no shame in that. Photo may not be the thing for you. Me…? I just want you to be happy. Get a camera, take some pics. If you find that it’s not for you, take up dance lessons. But my purpose is to holla at you about photo, so that’s what I’m about. It’s all about choices and what you choose to prioritize. You can make getting that new car stereo for $600 your priority if you so choose. You can also get a new wide-angle lens for your crop-sensor camera for even less than that.
Granted, you have to do this with a pandemic in mind, so do what’s best for you. Book at trip to El Salvador for that same $600, and forgo the car stereo. I’m not asking you to go somewhere you can drive to. I want you to book a flight somewhere at that you’ve never been, preferably out of the country and do it specifically to shoot photos! Get a passport and go! If you can’t leave the country, pick a spot within YOUR country that you’ve never been to that is 100% unlike where you are now. Fly there with the resolved intent of shooting. Whichever will be the more rewarding experience… that’s what I want you to go for. Now get to it. You can do this.
 |
| Art Model, Emma |

by photoanthems | Jul 20, 2021 | Blog
 |
Art Model, Jenny Anne Rose ©2019 Terrell Neasley
Window light coming in from the front |
“Wherever there is light, one can photograph.”
~ Alfred Stieglitz
Of course, daylight from the sun is a type of natural light. Same as light coming from the moon, stars, a candle, fireplace, or fireflies. Ambient light is the opposite of flash and is a constant light that stays on continuously for a time. It might also be referred to as Available Light. Artificial ambient light can be the incandescent bulbs that light your house or the light that automatically comes on to illuminate your the interior of your fridge when you open it. The natural light photogs can get a little something out of this. Anyone can take a photo in the daylight when all the settings are done in either Full Auto or “P”-mode. Just let the camera do all the work and you’re good to go. However, to bring back that passion, try this: work with ambient light in the darker settings and use any available light that you can come up with. I’ve used light from a cell phone held close to a model’s face. I’ve used the moon on a 8 second exposure.
But here are a few things you’re gonna need in order to get busy with this concept. In the last post, I set you up with flash and triggers for under $200. In this case, I’m gonna stay in that same neighborhood. I’ll begin with a good tripod. I’ve worked with several new and aspiring photogs who make a dubious mistake in my opinion. And when I say, “in my opinion”, it’s just that. I’m not quoting law and regulations. It’s my perspective that when I see someone spend a grand or more on a good camera and then shop for a $25 tripod, I’m just gonna say no. When I worked at B&C Camera, usually the cheapest I get them out of the door with is a
$160 Promaster system that will take care of their support and stabilization needs. You simply don’t trust a thousand dollars on twenty dollar legs. Just don’t do it.
 |
Art Model, Jenny Anne Rose ©2019 Terrell Neasley
Strip of light coming through window light from the front |
I use Promaster tripods myself! I travel the world with a smaller, lightweight carbon fiber system that handles all my needs. Its strong and more compact to travel with. Back home in the U.S., I use a bigger, but medium sized Manfrotto 190CXPRO4 Tripod with Ball Head Q2 carbon fiber unit that is the most beautiful system out there. Aesthetics usually don’t count, but I fell in love with this thing a few years back and it’s gorgeous as well as strong. Good sturdy legs are key. Next is having a ball head that can support the weight of your camera when it’s tilted vertical. I like mine to be extra strong in this regard. When a camera is tilted vertically, it’s actually off of the tripod’s center of gravity. I never use the extended neck on these tripods for that very reason, as sometimes the vertical perspective is necessary.
“What makes photography a strange invention is that its primary raw materials are light and time.”
~ John Berger
You can definitely pick up a used tripod system somewhere. There are super easy to test out and confirm it’s serviceability prior to you trusting it with your camera out in the field. If you can get a good one for cheap, go for it. I like mine new and simply won’t go for a used support system. That’s just me. Every manufacturer will make tripods of various qualities, sizes, max weights, and different price points. Carbon fiber will usually run you double what an aluminum will cost. I like carbon fiber a lot. Find what suits you best in the budget you choose.
 |
Art Model, Jenny Anne Rose ©2019 Terrell Neasley
Early morning eight-second exposure |
The next most important item is going to be a cable release or remote shutter release system that plugs into your camera and allows you to actuate the shutter release without having to touch the camera itself and thus causing camera shake. Promaster makes several for just about every camera system and when I do my one-on-one trainings, I’ll generally have my students pick up one for $20 to $30, depending on what cameras system they have.
Next all you need is a still subject and the proficiency to shoot them giving the lighting challenges and/or low light limitations of your camera. If you have any of the Sony A7S models, then you don’t really have any camera low light limitations. If you’re working with a camera with ISO deficiencies, then yes, you’ll have to work within that. But generally speaking, you’ll be on a tripod, so ISO 100 will usually suffice. I say generally, because if you’re doing astro work, then max ISO is where you’ll be. In either case doing a portrait in single-sourced low light can be both fun and challenging, but it’s sure to pay off with some good work.
 |
Art Model, Jenny Anne Rose ©2019 Terrell Neasley
Outdoor lamp post shining in through side window |
You can easily get started by using the obvious sources of light around you. The lamp on your light stand; the light coming off the TV or computer monitor, an overhead patio light. Get creative with it. Try using the refrigerator light, a match, a headlamp, a night light. You can even play with different LED lights you might find in the toy section or automotive departments. Experiment! That’s the main aim here. Experimentation and just play. Use a lowest ISO setting on your camera unless you are NOT using a tripod. In which case you want to use the lowest ISO you can get away with. Target an ISO that will allow for a shutter speed of at least 1/60th of a second, but cheat a little if you can. Go to 1/30th or even 1/15th and get some interesting blur. Have your model be as still as possible, but only move her head from one side to the other with a 2 second shutter. If you are not using a model and are doing night time/low light landscape, well, look to see if the wind is blowing the trees or tall grass and let that determine what your shutter should be. Just go out there and shoot and see what happens. Have some fun with this!
by photoanthems | Jul 10, 2021 | Blog
“In photography there are no shadows that cannot be illuminated.”
~ August Sander
 |
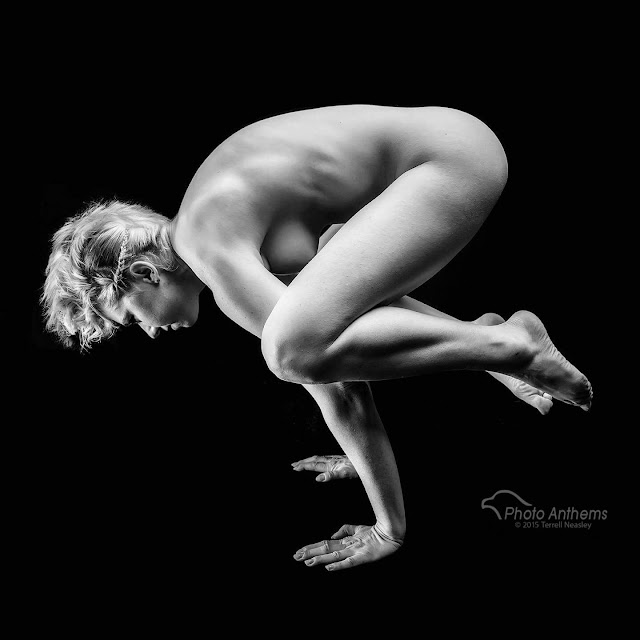
Art Model, @Kayci.Lee, ©2015 Terrell Neasley
Studio Flash, Paul C. Buff Einstein 640 with 6′ Octobox |
In many of my posts, I mentioned one way to expand your efforts to get excited about photo again was to start using flash in your work. Now, granted… this post won’t be necessarily for everybody. Some of you togs already have a great grip on this thing and it’s not your weakness by any stretch of the imagination. If that’s the case, then just enjoy the pictures. However, if you do NOT have an acute aptitude for artificial light, namely flash lighting kits, then let’s start small and follow me a little ways down the rabbit hole. Just bare in mind, this is not a comprehensive blog post on flash. There is too much to get into for a few paragraphs. For now, let it lead you to further research, but if you have questions, pop them into the comments.
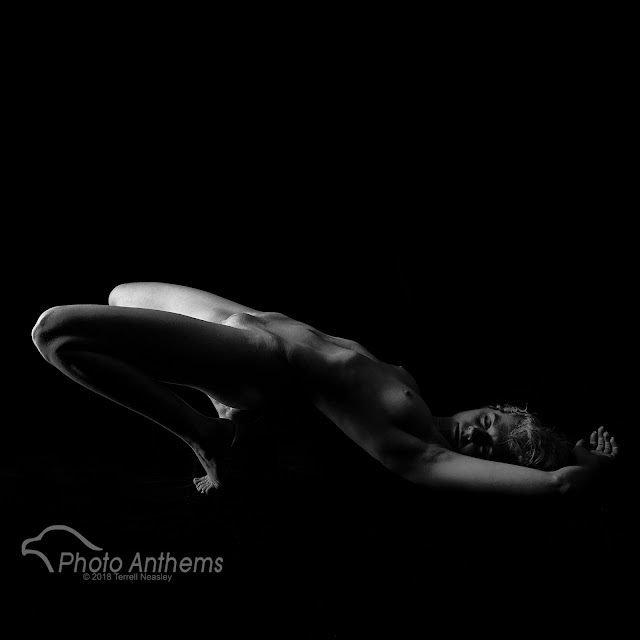 |
Art Model, @Kayci.Lee, ©2015 Terrell Neasley
Studio Flash, Paul C. Buff Einstein 640 with 6′ Strip Box
|
First things first. Can’t be scared of light! As I have said before, most photog won’t use it cuz they’re scared of it. Ignorance of a thing is not a reason to fear a thing. Also, light is cheap. Yes, you can go pick up the high end flash units by Sony, Nikon, or Canon and pay skyward of $600 for a speedlight flash gun. If that is not a problem for you, then by all means, go for it. It will serve you well. If you need to start out on a budget, consider finding used gear like the Canon 430EX II or the Nikon SB-700 for your run and gun, on the go needs. I STILL use the Canon 430EX II that I bought used, even though I shoot Sony! I never shoot with the flash sitting on the camera, preferring instead to use flash triggers like I will point out in a minute. I have to travel small and make due with as little gear as I can get away with while I am traveling. You can find used these flashes give you lots of latitude and features that eliminate most every possible excuse you may have. You won’t outgrow them and they will probably wear out from use long before they become obsolete.
There are also more options available to you. First, you can rent for a weekend for $20 bucks. Second, you can go off-brand with several makers. Check out Godox brands that have speedlight flash units for $100 to $200. You can pick these up for your specific camera brand, such as a Godox VING V860IIC which is one version made specifically for shooting TTL for Canon cameras (Notice the “C” at the end of the model name). TTL means Through The Lens, but for now just think of it as automatic mode. If your camera is in automatic AND you have it ON the camera, it communicates with the camera and sets the flash power for you. However, I strongly advise to learn manual control and practice shooting OFF-CAMERA! Be sure to get the version that is made for your camera brand.
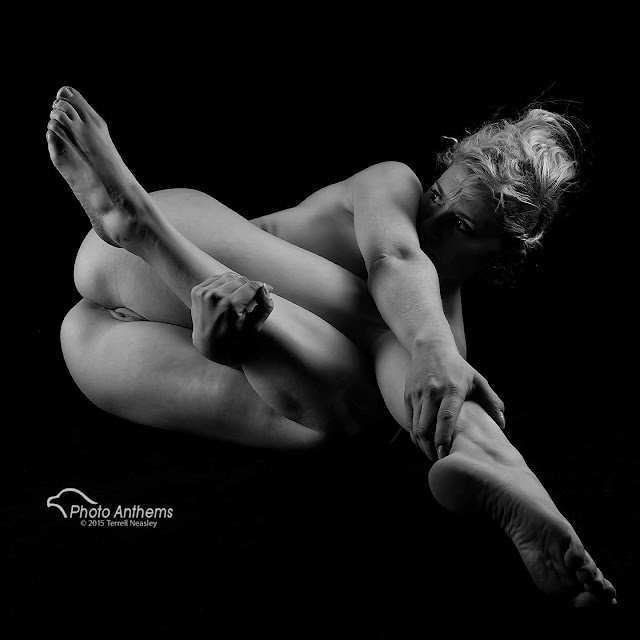 |
Art Model, @Kayci.Lee, ©2015 Terrell Neasley
Studio Flash, Paul C. Buff Einstein 640 with 6′ Octobox |
And if you want to shoot with the flash OFF the camera, take a look at the wireless transmitter/receiver systems. It uses a radio signal that isn’t so easily obstructed by a wall, for instance, if your flash sits around the corner. Easy-Peasy! This gives you the ability place your flash unit anywhere you need it besides just sitting on top of the camera. Pick up a light stand or clamps for something to mount the flash on. I’ll also add in there to pick up an umbrella holder so the flash can be mounted on something that can allow it to bend and point in any direction.
On another quick note, studio light kits are the best! I shoot with them more than speedlights when I am not traveling. These kits usually come with a two light set-up and will often include some type of modifier… possibly an umbrella or softbox. I implore you to take a look at them if they suit what you do.
“Essentially what photography is is life lit up.”
~ Sam Abell
I could throw in one more accessory, which is a flash diffuser of some kind. Is it necessary? Yeah, kinda. I don’t really use a flash without something diffusing the light a bit, but I’ve seen plenty. It’s kind of like a saddle on a horse. You don’t HAVE to use one, but if you don’t, it’s gonna be a hard ride. Okay, screw it… pick up an umbrella while you’re at the camera shop. Now, back to my main thing. For about $200 you can practice and get a better grip on flash and really step up your work. Flash is cool because it’s lightweight and portable. All you need is some double-A’s and you’re off and running. Keep in mind. Flash isn’t just used for night time shots! The question I get most often is, “Why would you use flash during the day?” Simple… Cuz the sun can make harsh shadows. Using flash as some fill light is an excellent solution. Now your model doesn’t have to squint because the sun is in her/his eyes. And you can face the model away from the sun without their faces going into shadow. Oh yeah. Try exposing for that beautiful sunset AND your model without using flash and you’d better be good at composite work. Flash isn’t just for studio. I take it with me just about everywhere.
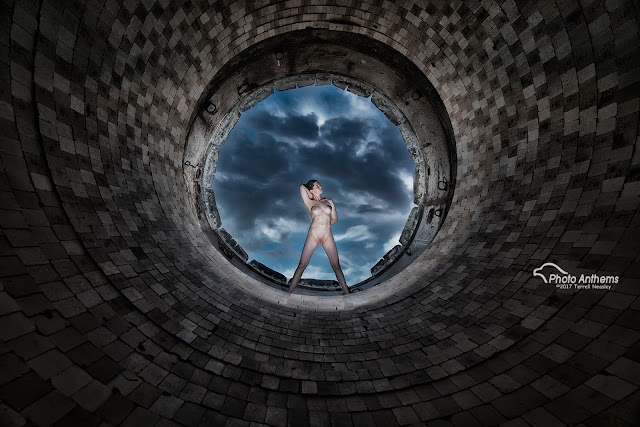 |
Art Model, @Kayci.Lee, ©2017 Terrell Neasley
Outdoor using Speedlight flash units with radio triggers |
Do yourself a huge favor and just run through the manual. It may look thick but that’s just cuz it’s also in several different languages. Know how to turn it on and set power levels for starters and then go shoot. I’m not often shooting at 1/1, which is the full power setting. I’m usually at 1/8th power or below. Set the flash up about 45 degrees left or right of your subject. Now chances are, you’ll have to manually adjust the power settings, but even with that, once you get it within a tolerable range, you can adjust your aperture to control the flash. Big Tip: Shutter Speed controls ambient/constant light (daylight or lighting that stays on). Aperture controls Flash. Opening up the aperture increases the flash’s intensity, while closing down does the opposite. So within a certain range of exposure, you can use the aperture settings (shooting in Manual or Aperture Priority Mode) to control the flash output.
Play with this in varying degrees of light as well in different locations. Try out some studio light kits! Add on a softbox with it. Add in more lights… such as one mounted BEHIND the subject! Trust me. It will bring the fun back. If you’re going to be in the Las Vegas area, check out B&C Camera at 4511 West Sahara, open every day from 9 am to 7 pm, except for Sunday hours which are 11 am to 5:30 pm. I used to work there. It’s a beautiful store with lots of knowledgeable people who can get you fixed up. Tell them I said hello for me!
 |
Art Model, @Kayci.Lee, ©2015 Terrell Neasley
Studio Flash, Paul C. Buff Einstein 640 with 6′ Octobox
|


